Step 1: Open a Virtual CodeSpace
While in your lastname branch in technologies-of-history/spring-2026, click the green Code button at the top right. Select CodeSpaces and then click Create codespace on [yourbranch]. A new browser window will open that mimics the interface of Microsoft VS Code, the text editor that integrates with GitHub.
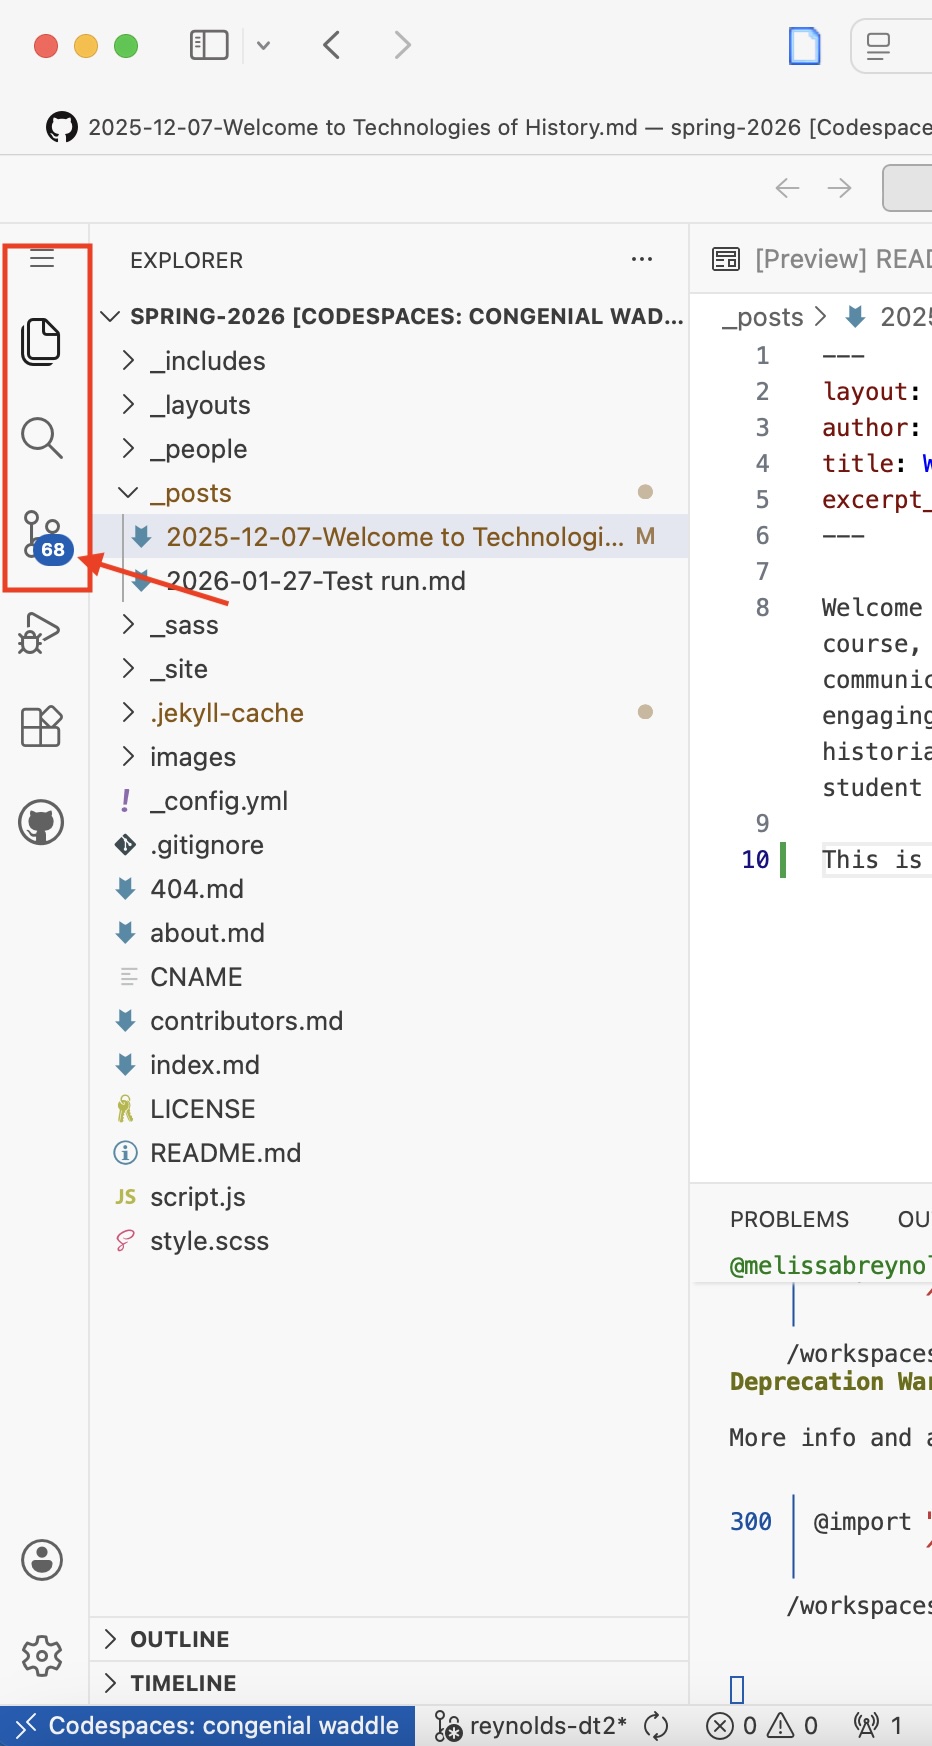
On the far left of the page, you’ll see a vertical menu that contains six icons, but you only need to worry about the top three: a file symbol; a magnifying glass; a network icon.
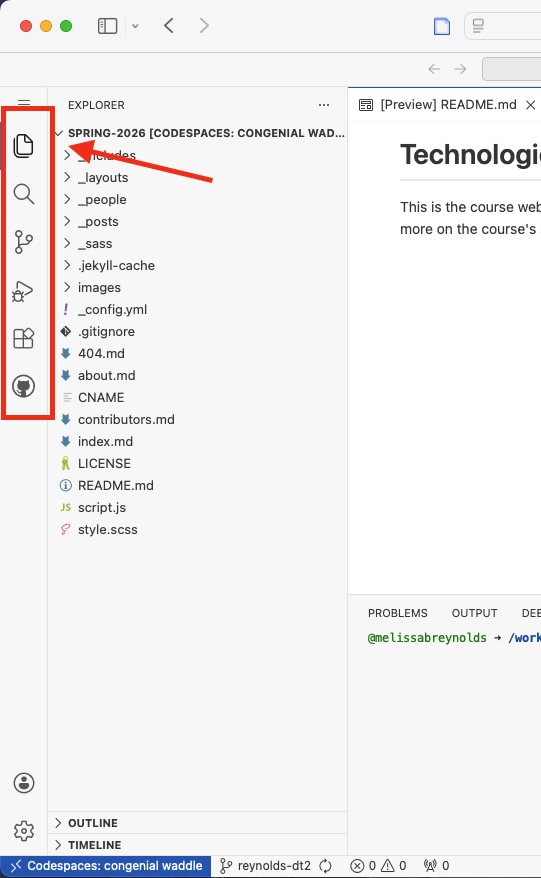
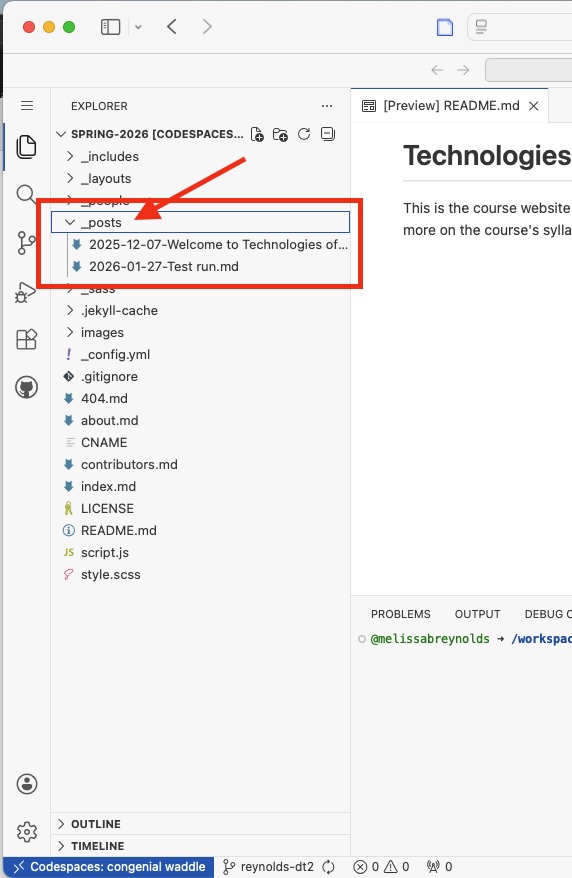
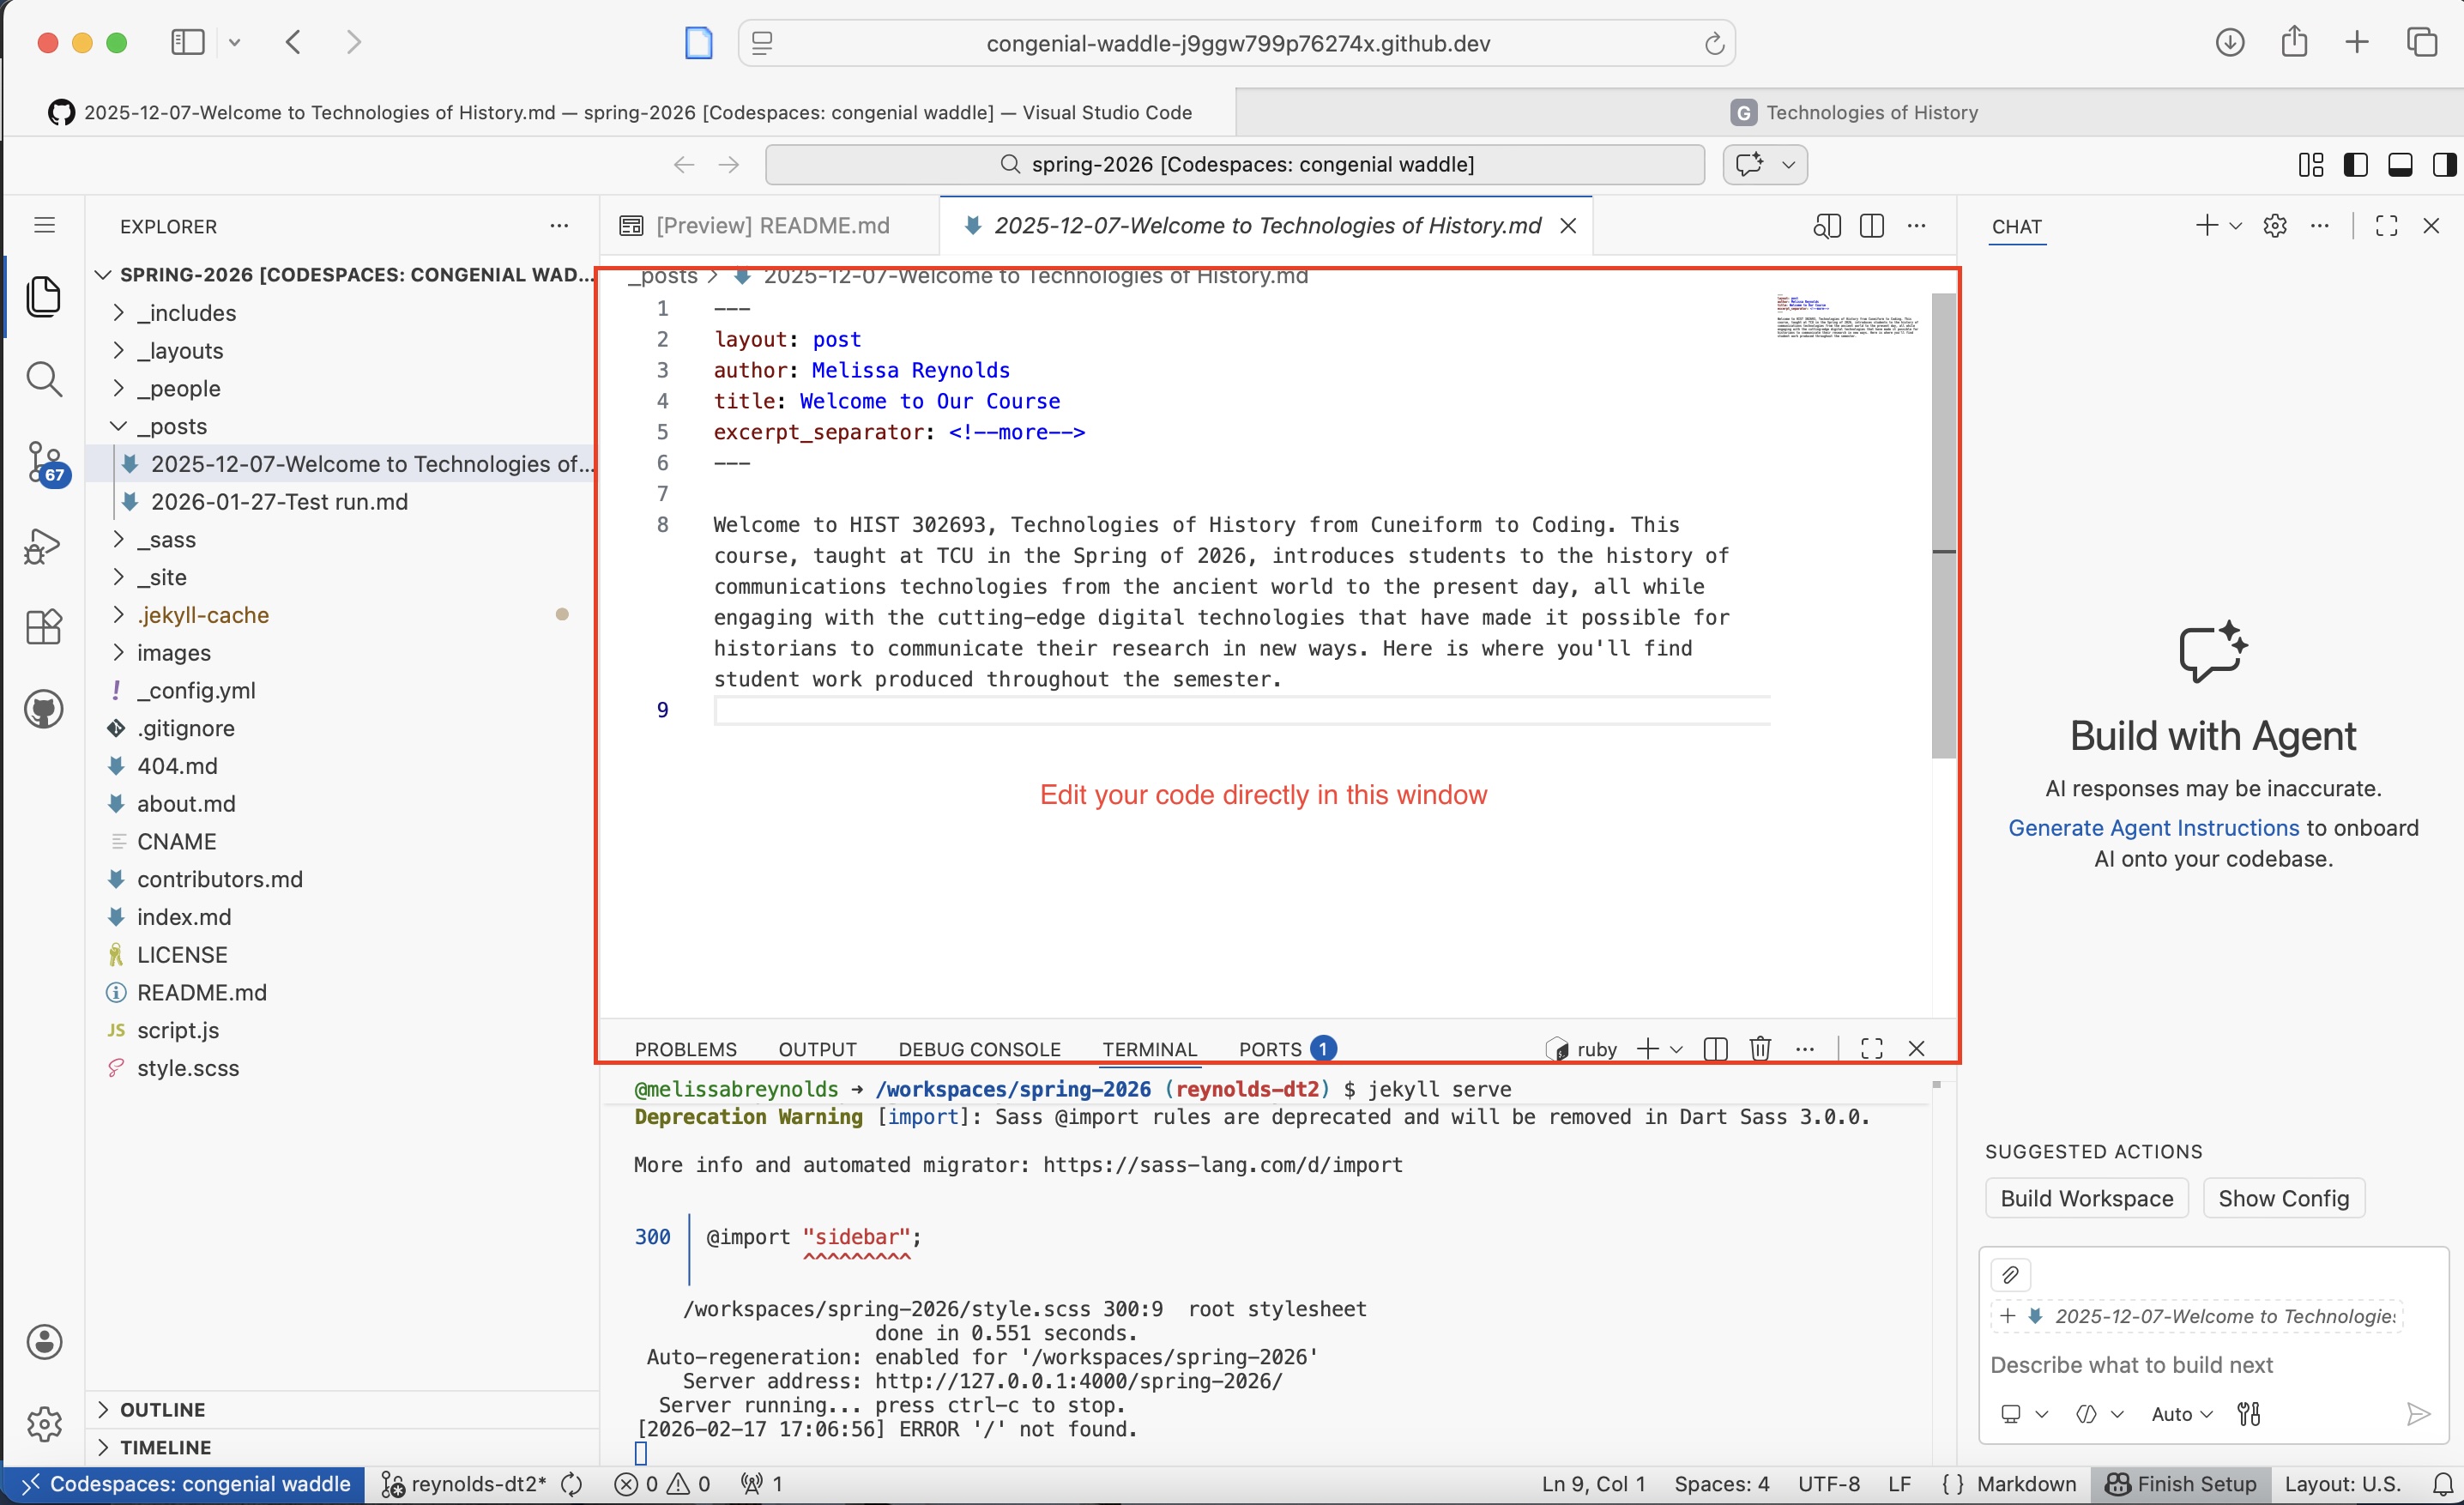
Click the file icon at the top of this vertical menu, and you’ll see the file structure of your branch of the spring-2026 repository. If you click the _posts folder, you’ll see your draft of the post for this digital tools assignment. Click on that Markdown file, and you’ll see all of your code.
Step 2: Open a virtual terminal & serve the site virtually
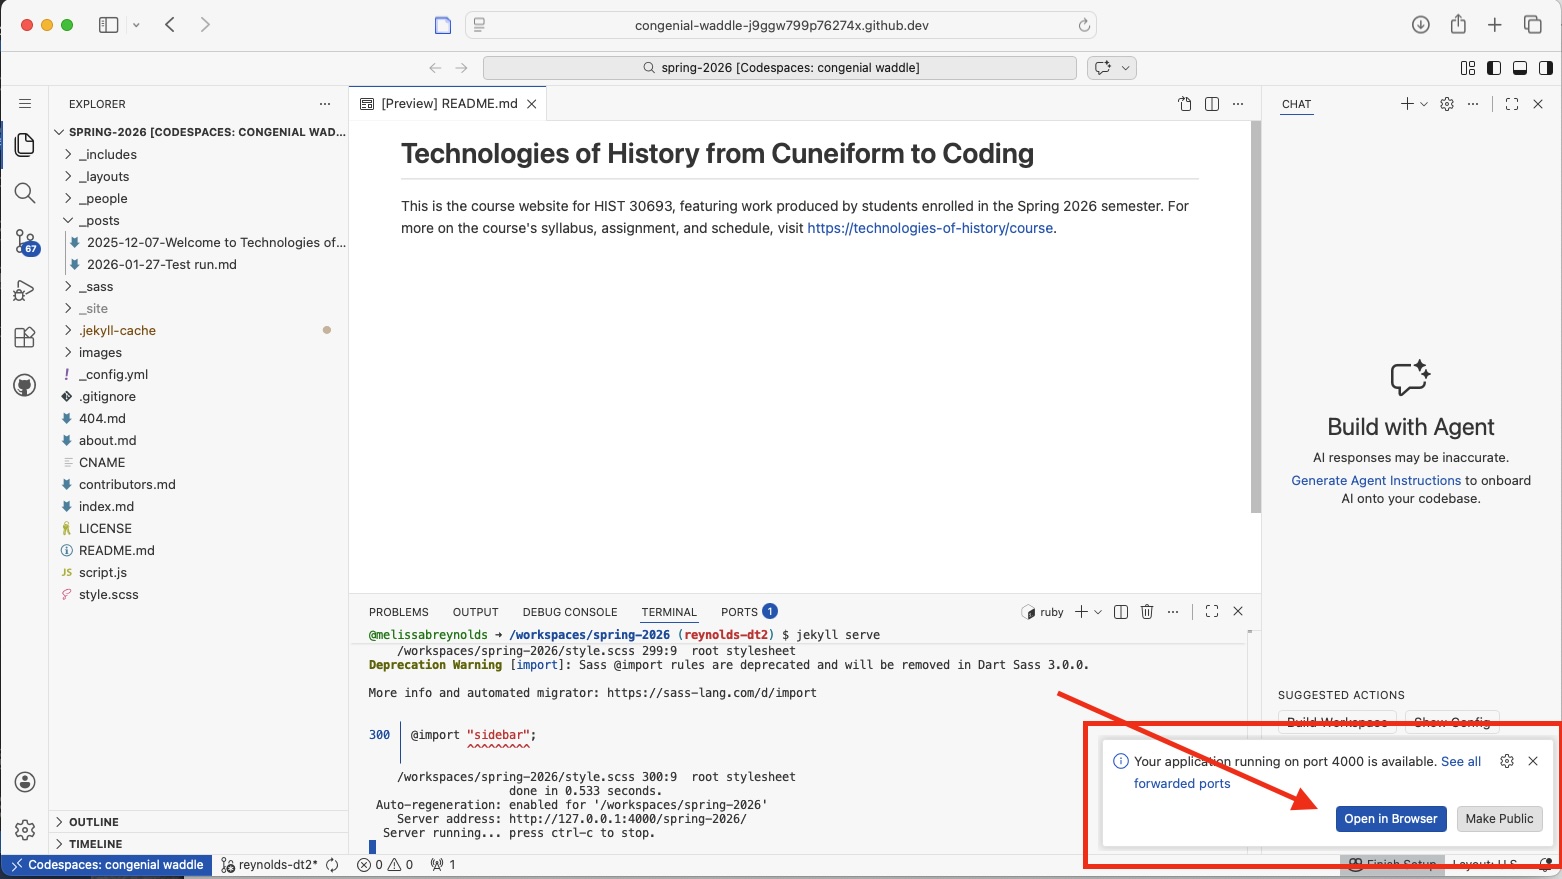
To check to see if you did everything correctly, we’re going to bring up the virtual terminal to use the command line. At the top right, you’ll see a series of boxes with dividers, which dictate which menus are showing in your VS Code interface.
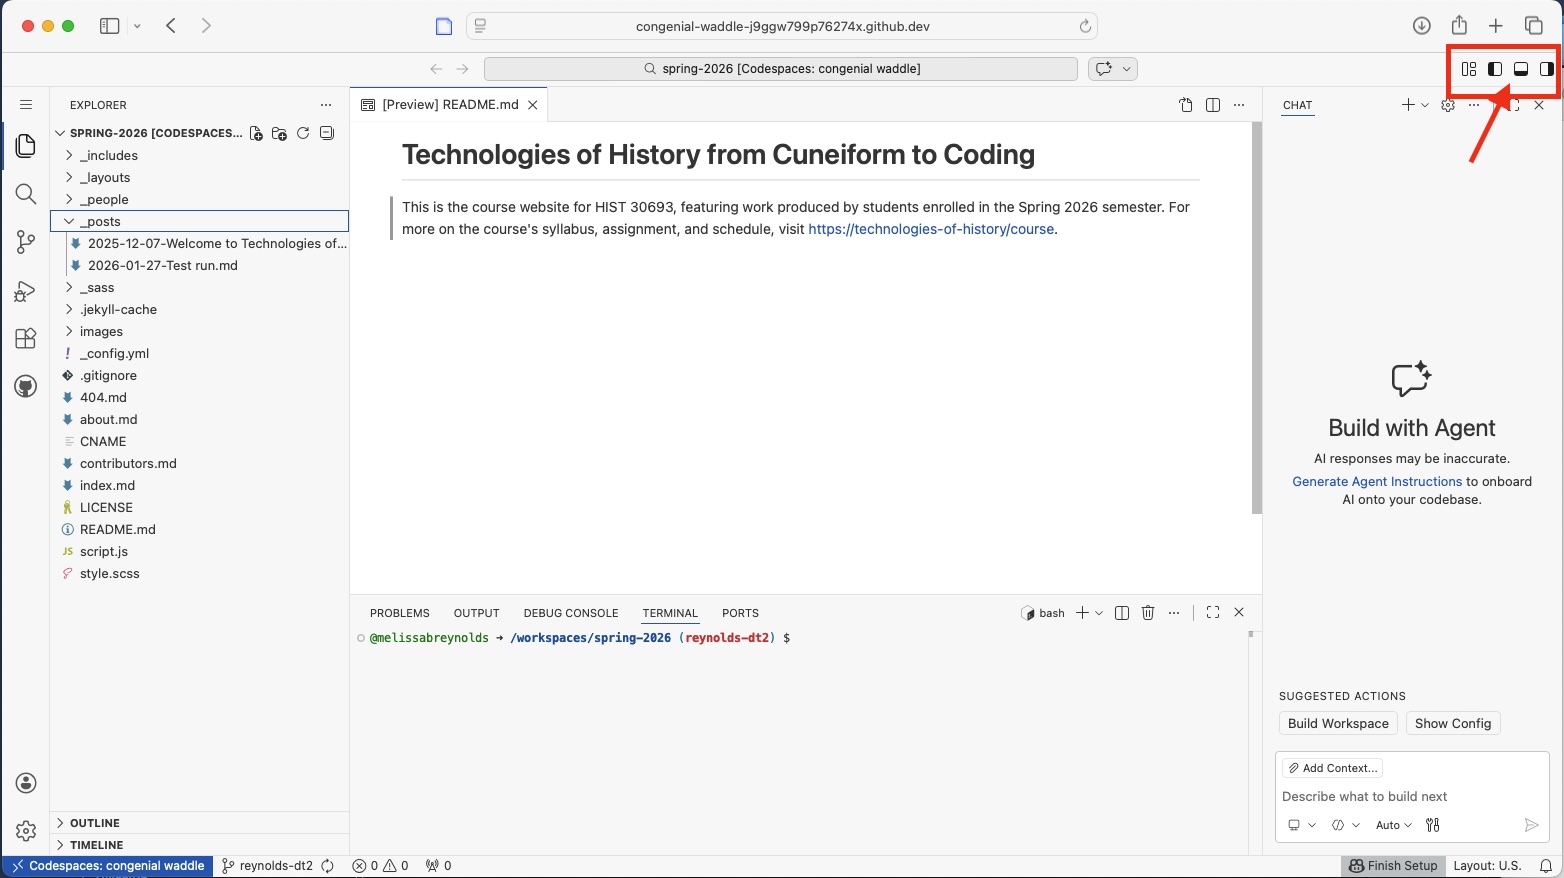
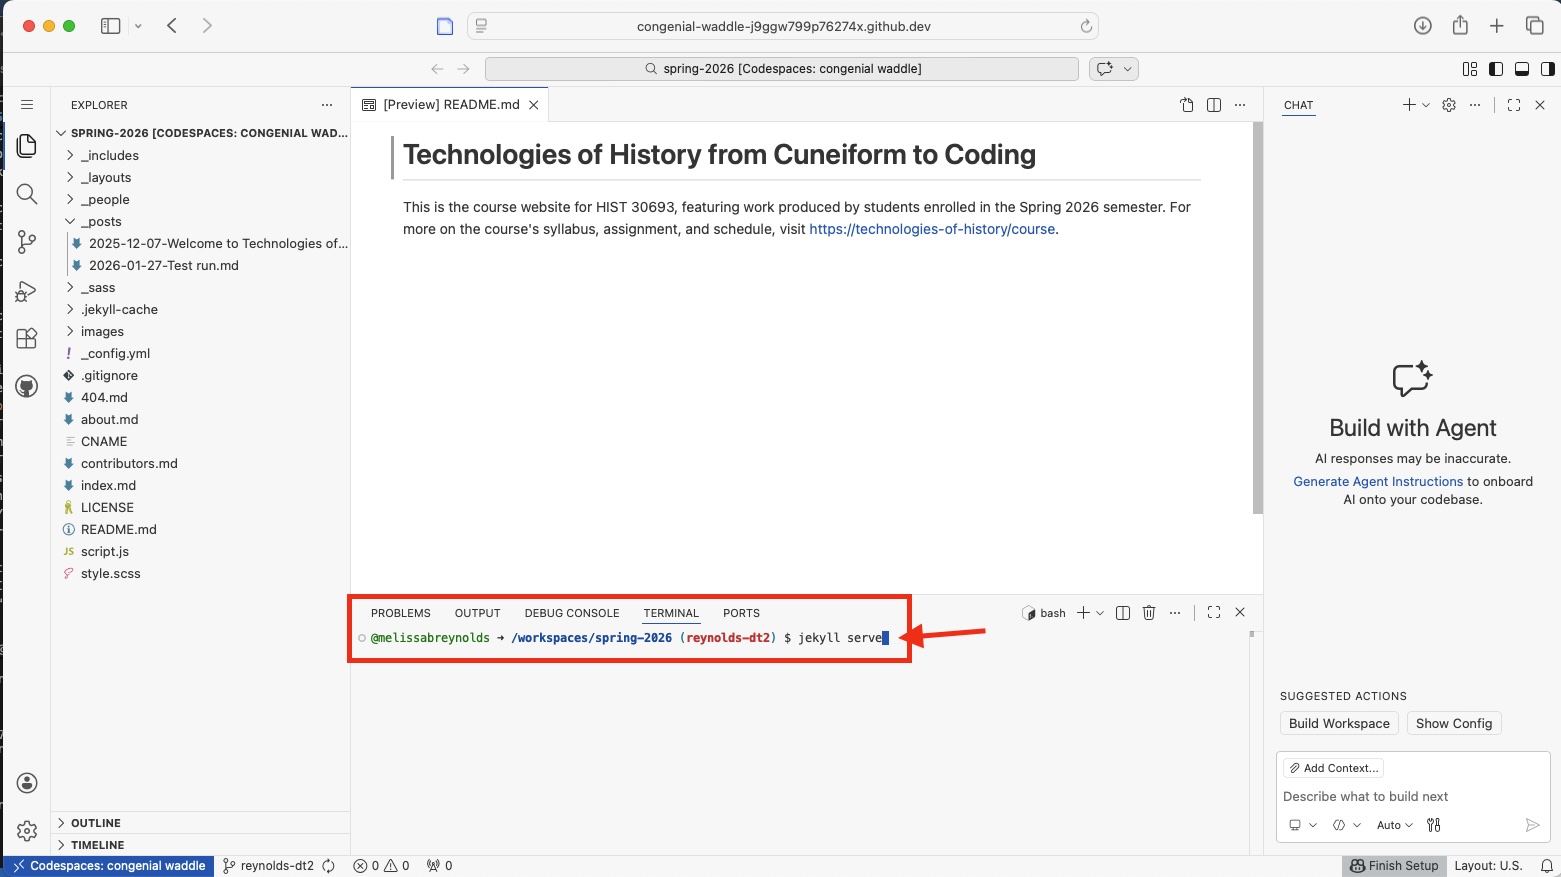
If it isn’t already selected, click the box divided horizontally across the middle to bring up your terminal. You’ll see a new interface appear at the bottom of your browser window with a line of text that reads like this:
@yourusername -> /workspaces/spring-2026 (lastname-dt2) $ This line tells you that your terminal is open in the spring-2026 repository and in your lastname-dt2 branch, so any commands you execute will be performed in this repository and on this branch. This is what we want! Type the command jekyll serve after the dollar sign and hit enter.
You’ll get some warnings about deprecated sass (ignore these), but note the pop-up window that appears at the bottom right of your browser window. Click Open in browser, and you’ve now been taken you to a url that loads our course blog on locally on your machine.
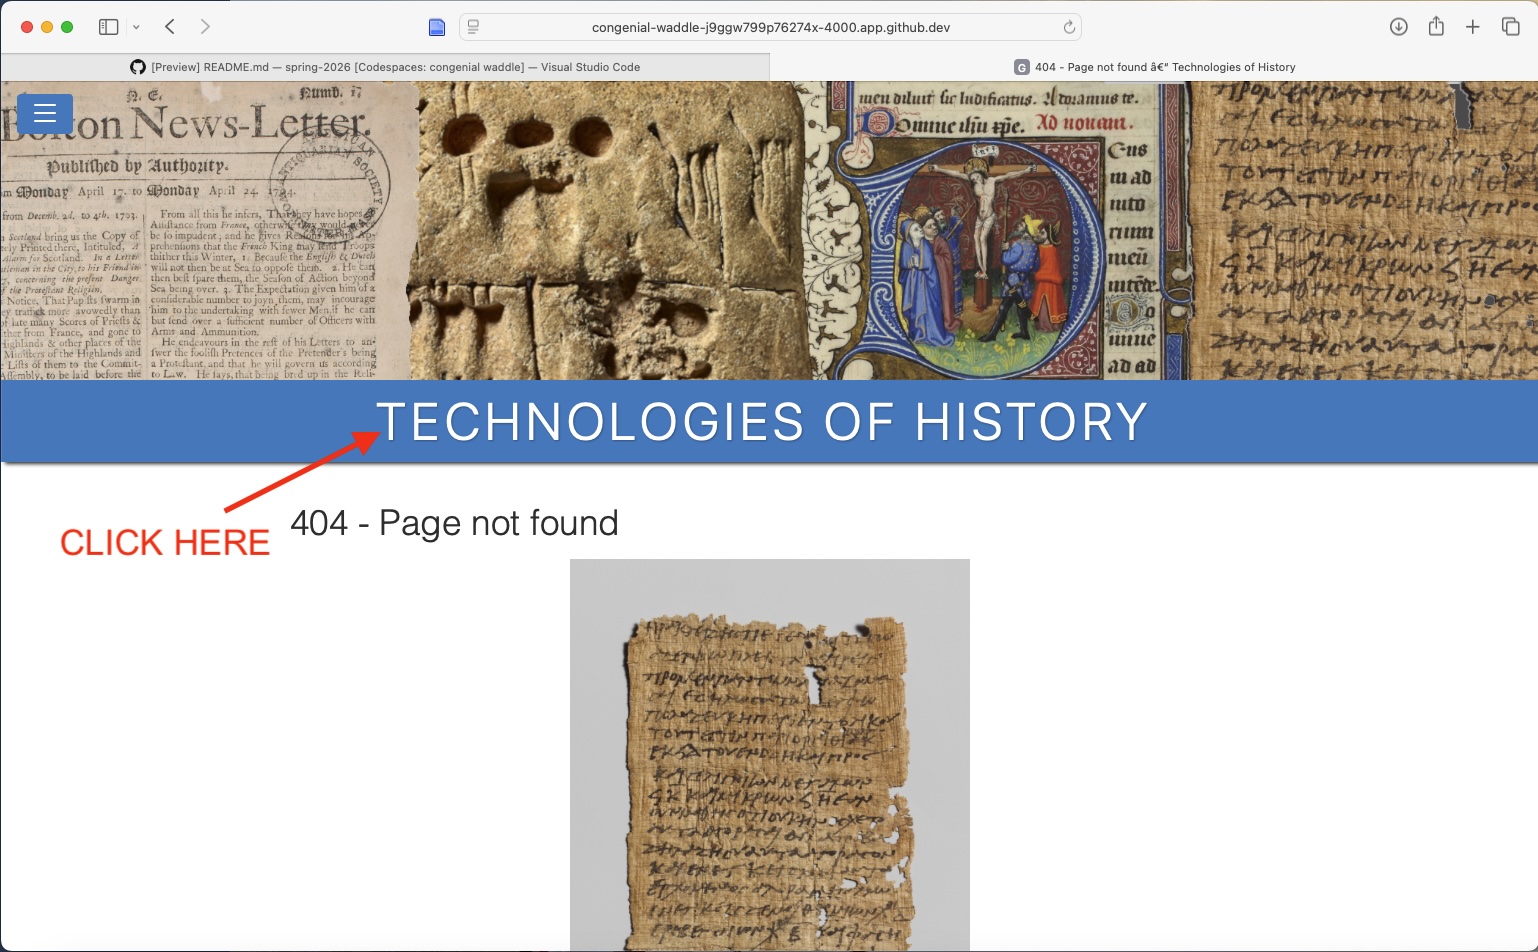
You may see the 404 page at first, and that’s fine. Click the site title and you’ll end up on our homepage, where you should see your draft blog post as the top item in the blogroll. Click the title of your post to open the full page and check to see that it looks the way you want it to.
Step 3: Make any necessary changes in your CodeSpace
If your post doesn’t look the way you want it to, return to the CodeSpace VS Code interface you’ve got open in another tab. Take a look at your Markdown file for this assignment and see if you can identify the problem. Tweak your code, then key in Command+S (for Mac users) or Conrtol+S (Windows users).
The server will automatically refresh the site build every time you save changes to that file. You don’t need to commit those changes yet, since at this point you’re working to see if you can get your code the way you want it. Every time you make a change and save it, you’ll just navigate back over to the tab where you are serving our site virtually, and refresh the page to see your changes appear in your post.
Step 4: Stop serving the site & commit your changes
Once you’re happy with how your post looks, you’ll want to stop serving your post virtually to the web. In the Terminal window at the bottom half of your screen, type Control+C to stop the jekyll serve command.
Finally, you’ll need Commit any changes you made to your Markdown post file. Click the Network icon at the far left vertical menu. This will bring up a list of all the files that have changed since you opened the repository.
 |
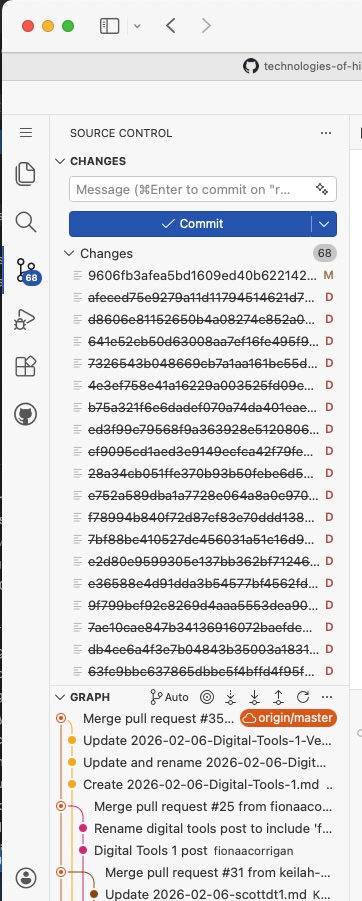 |
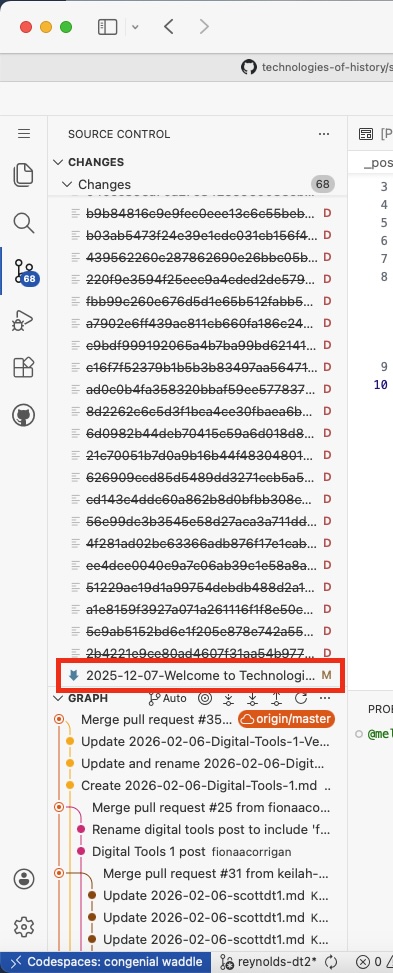
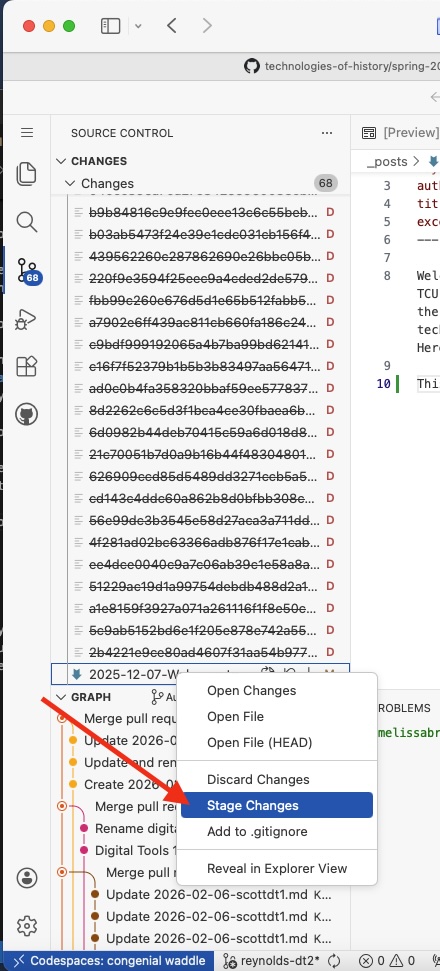
You’ll see lots of files with names that just look like strings of numbers; these are the temporary files generated to build the site, and you should ignore those. Scroll down to the bottom of that list of files with weird names, and you should see your post file YYYY-MM-DD-Your title here.md in the list. Right click the file name, and in the menu that appears, click Stage Changes.
 |
 |
Now, when you scroll back up to the top of that long list of changed files, you should see your post YYYY-MM-DD-Your title.md under the header Staged Changes. That means it’s staged for you to commit the file to your repository. Type your commit message in the blank window above the Staged Changes header, and then click the Commit button.
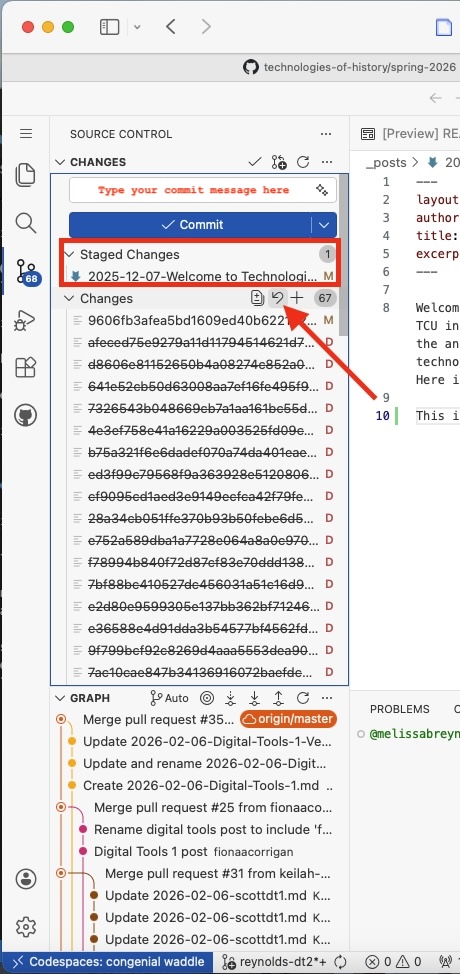
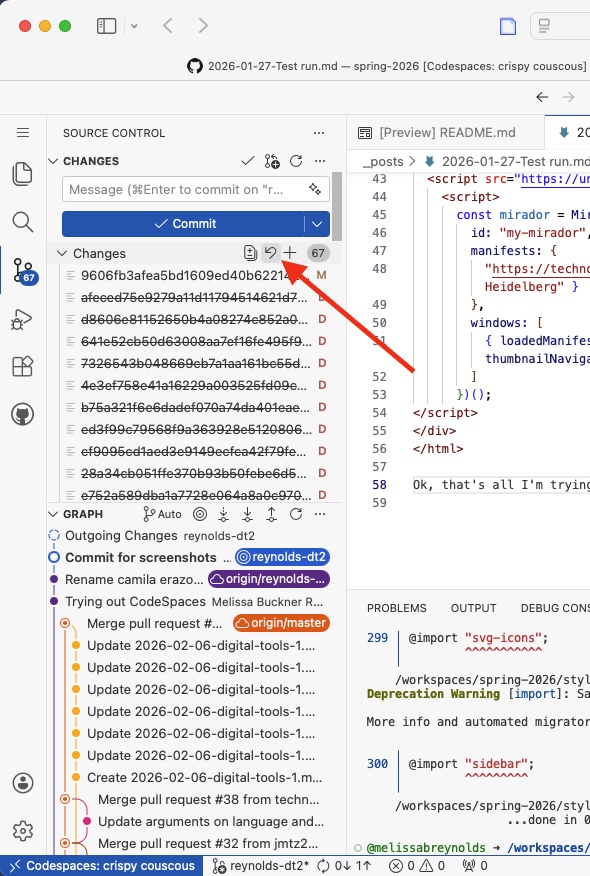
Now that you’ve committed your changes, you need to sync them with your branch. To do that, run your mouse over the Changes menu beneath the blank space for your commit message. A set of icons will appear on the right. Click the icon that looks like an arrow curving to the left to Discard Changes (remove all those temporary files you don’t need.) You’ll see a pop-up menu asking you if you’re sure. Click Discard all [##] files.
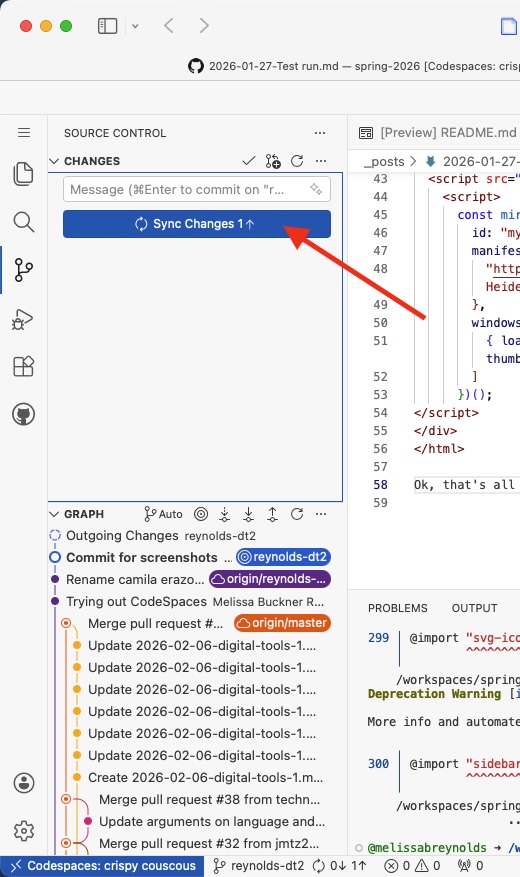
Now, the blue button that once read Commit should read Sync Changes. Click that button and you’ll see a pop-up menu confirming you want to push/pull to and from your branch. Agree to that, and you’re all done!
You can close out of the virtual CodeSpace browser tab and the one you were using to view your post as you worked on it. Your very last step is to return to the regular GitHub page. Make sure you’ve got your lastname branch selected. Click the green Code button at the top right and select Codespaces if it’s not already open. Finally, click the three dots to the right and select Delete codespace.